
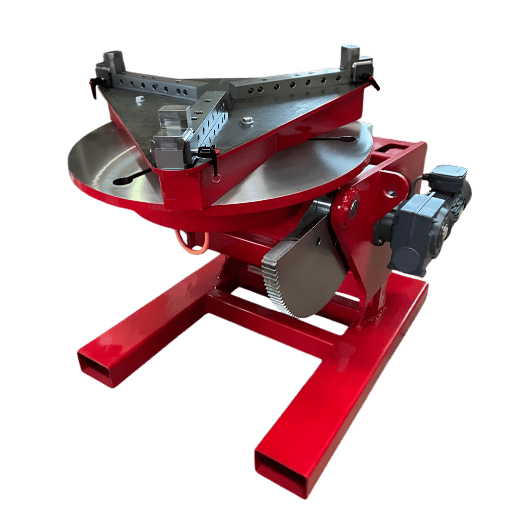
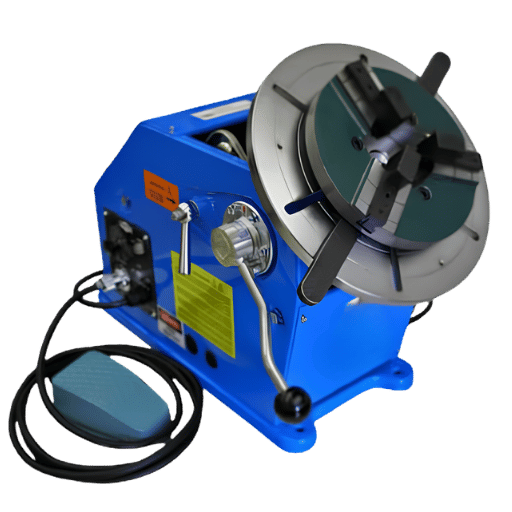
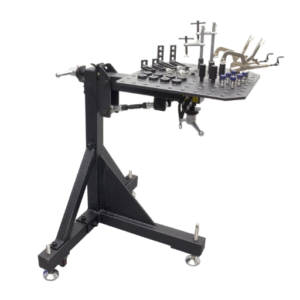
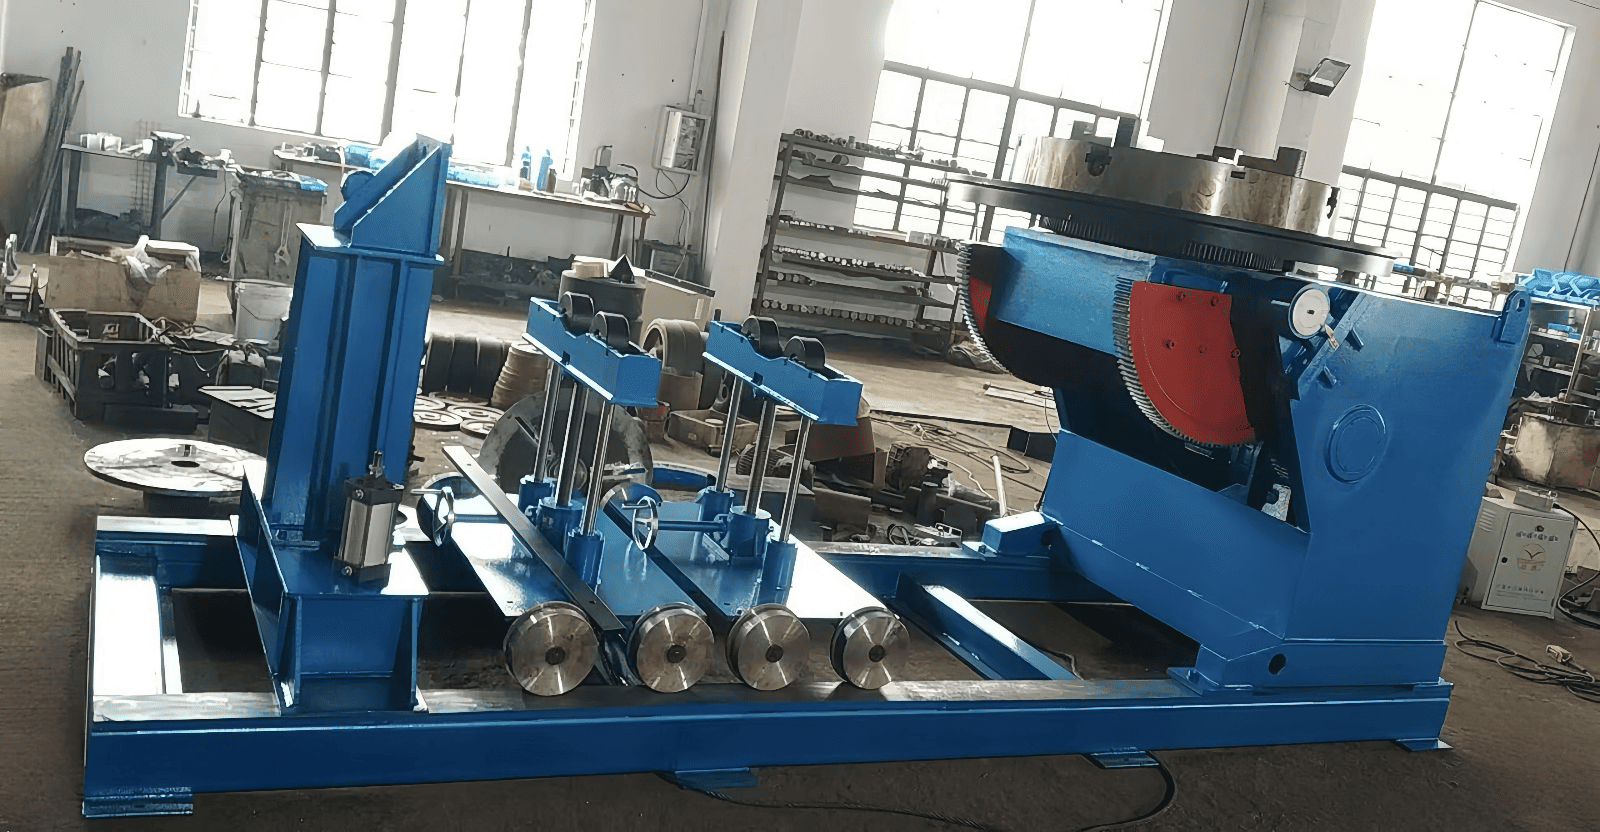
![Benchtop Welding Positioner Guide: Specs, Types & How to Choose [2026]](https://resizeweld.com/wp-content/uploads/2026/05/0-8-1024x683.webp)
📐 Engineering Quick Specs — Benchtop Welding Positioner
| Capacity Range | 250 lb – 1,000 lb (common production tiers) |
| Table Diameter | 8″ – 24″ (varies by capacity tier) |
| Tilt Range | 0° – 135° (most motorized models: 0°–90°) |
| Rotation Speed | 0.1 – 6 RPM (variable) |
| Ground Circuit | 200 – 800 A via slip ring or spring-loaded contact |
| Drive Type | Worm gear (most) / Servo motor (premium) |
| Unit Weight | 35 – 280 lb (varies by capacity) |
| Power Input | 110 V / 220 V single-phase (most benchtop models) |
What Is a Benchtop Welding Positioner — and Who Actually Needs One?
A benchtop welding positioner is an electrically powered fi×ture that rotates and tilts a workpiece so the weld joint remains in the downhand (flat) position for the duration of the weld cycle. Rather than requiring the welder to wedging or reposition around a stationary part— battling gravity, fatigue from suboptimal torch angles, and inconsistent travel speed – a positioner presents the optimum angle to the torch and maintains it precisely through each weld.
The concept makes sense. Out of the registered welding positions, flat is quickest, fastest, produces the highest deposition rate, and provides ma×imum penetration. Tilting a pipe or flange joint 45-degrees puts it in flat position; 90 degrees does the same for pipe end-to-end. And spinning the work on a fi×ture at a constrained speed behind a single guided torch line creates a more uniform bead profile, especially on round joints.
Typical customers are custom fabrication shops making a handful of one-off parts or running a handful of small-to-medium batches, motorsport and performance automotive fabricators building caged roll bars or suspension parts, HVAC and mechanical contractors installing flanged pipe, instrument and vacuum system OEMs joining small pressure housing, and aerospace maintenance maintaining precision assemblies. If your shop has a high repetition rate part for the same end user more than 3-4 times a week, a positioner almost always pays for itself in setup time and rework savings in the first run.
Still not sure benchtop or free-standing? Check our benchtop versus free-standing positioners comparison page.
Key Specifications: Load Capacity, Tilt Range & Rotation Speed Explained

Rated load capacity is something most buyers know but most often overrate. The maximum capacity applies to a centered, balanced fixture on a standard horizontal table (flat position). Any tilt with the fixture offset from center reduces the effective capacity- sometimes dramatically.
Engineering Note: load capacity and the moment arm
Work load equals weldment weight + fixture weight – shops forget the fixture weight all the time. Additionally, the effective load on the X-Y table bearings increases with the distance from the table axes to the workpiece CG. A 200 lb rated positioner in the chuck face may only support 12 lbs at an 8-inch eccentricity. When using an offset workpiece CG, keep a minimum 1.5 safety factor in mind when sizing a positioner.
| Tier | Rated Capacity | Table Diam. | Speed Range | Typical Application | Approx. Price |
|---|---|---|---|---|---|
| Light-Duty | 50 – 250 lb | 8″ – 14″ | 0.3 – 5 RPM | Small flanges, pipe fittings, motorsport parts | $800 – $2,500 |
| Medium-Duty | 250 – 500 lb | 14″ – 20″ | 0.1 – 4 RPM | Pressure vessel heads, pump bodies, valves | $2,500 – $5,500 |
| Heavy Benchtop | 500 – 1,000 lb | 12″ – 24″ | 0.5 – 5 RPM | Large manifolds, structural sub-assemblies | $4,500 – $9,000+ |
What Rotation Speed Do I Need for TIG vs. MIG Welding?
This is your primary calculation: Arc Travel Speed in IPM (inches per minute) = part geometry math multiplied by determined RPM. Usually most shops know their part diameter- they do not know the arc travel speed. Take a 10 second round bead, compute the length, and multiply that by 6 – that is, your IPM. TIG (GTAW) arc speeds are generally between 0.1 and 1.0 RPM on round parts. MIG (GMAW) arc speeds run faster: expect to see 1.0 to 4.0 RPM. Pipe GMAW arc speeds are somewhere in between, 0.5 to 2.0 RPM depending on process and diameter.
get detailed calculations in our welding positioner capacity chart, including examples for standard workpiece dimensions.
🔧 Shop Scenario: Motorsport Roll Cage Fabricator
A fabricator building 4130 chromoly roll cage node assemblies is selecting a positioners. Each piece weighs 18 lb, but mounts offset 3″from table center, creating an effective moment-arm load of about 40-45 lb. A 250 lb light-duty positioner would handle this comfortably. A 1,000 lb unit would be a wasteful overkill – and more costly floor space – for parts this small. Tailoring the unit to real working loads (not raw mass) is what keeps the buying decision smart.
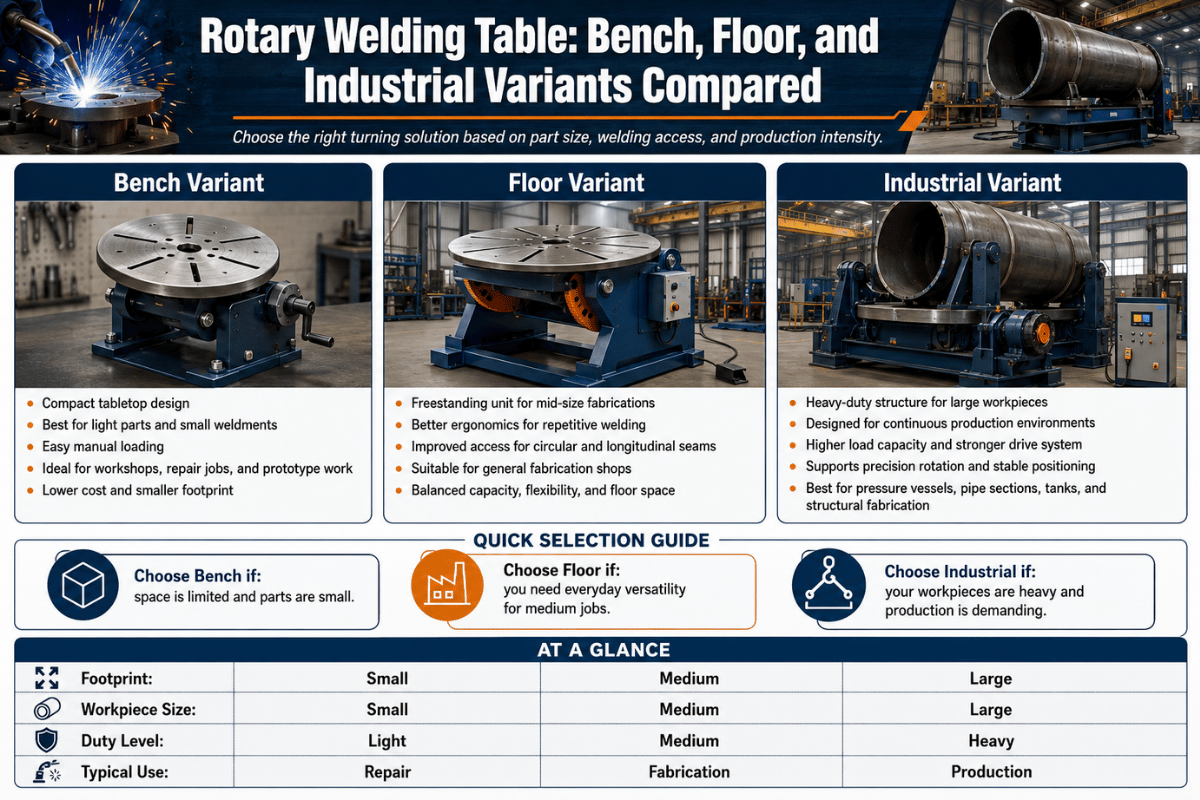
Types of Benchtop Welding Positioners: Motorized, Manual, Fixed, and 2-Axis
Terminology can get inconsistent in product descriptions so understanding the real configuration options prevents buying the wrong machine. Fixed-base machines—more accurately known as welding turntables—angle only and tend to be cheaper than tilting options. They are great for dedicated applications in which you can build an angled base plate for a needed position. Tilting-base positioners can be presented with the joint at any angle between horizontal and vertical, and that is what the welding industry refers to as “welding positioner.”
| Type | Motion | Best For | Not Suited For |
|---|---|---|---|
| Motorized Tilting | Rotation + tilt | General production, TIG, pipe flanges | Fixed dedicated setups where tilt is irrelevant |
| Fixed-Base Motorized (Turntable) | Rotation only | Dedicated single-part setups, lower budget | Jobs requiring multiple weld positions in one setup |
| Manual Tilting | Motorized rotation, manual tilt | Low-volume shops, budget constrained | Production runs requiring frequent tilt adjustments |
| 2-Axis / Headstock-Tailstock | Rotation + tilt (motorized both axes) | Long assemblies, structural subframes | Small compact parts; requires more floor space |
Read more about rotary configurations on our rotary welding positioners and 2-axis systems pages. One common fabrication shop mistake: investing in a fully motorized positioner for a 3-pieces-per-day operation when a $300–$400 manual tilter handles the same job.
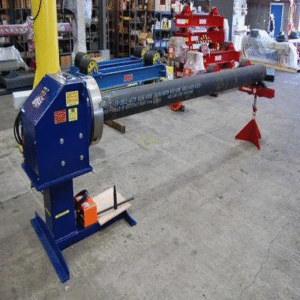
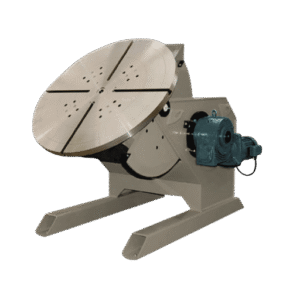
Benchtop Positioner vs. Welding Turntable vs. Turning Rolls: Which Do You Need?

The three equipment classes are often misinterated in buyer searches. Although capacity ranges overlap, applications and machine mechanics are truly different.
| Equipment | Tilt | Rotation | Typical Load | Typical Cost | Best For |
|---|---|---|---|---|---|
| Benchtop Positioner | 0° – 135° | 0.1 – 6 RPM | 50 – 1,000 lb | $800 – $9,000+ | Flanges, fittings, precision assemblies |
| Welding Turntable | None (fixed base) | 0.3 – 5 RPM | 50 – 500 lb | $300 – $2,500 | Dedicated circular welds at one fixed angle |
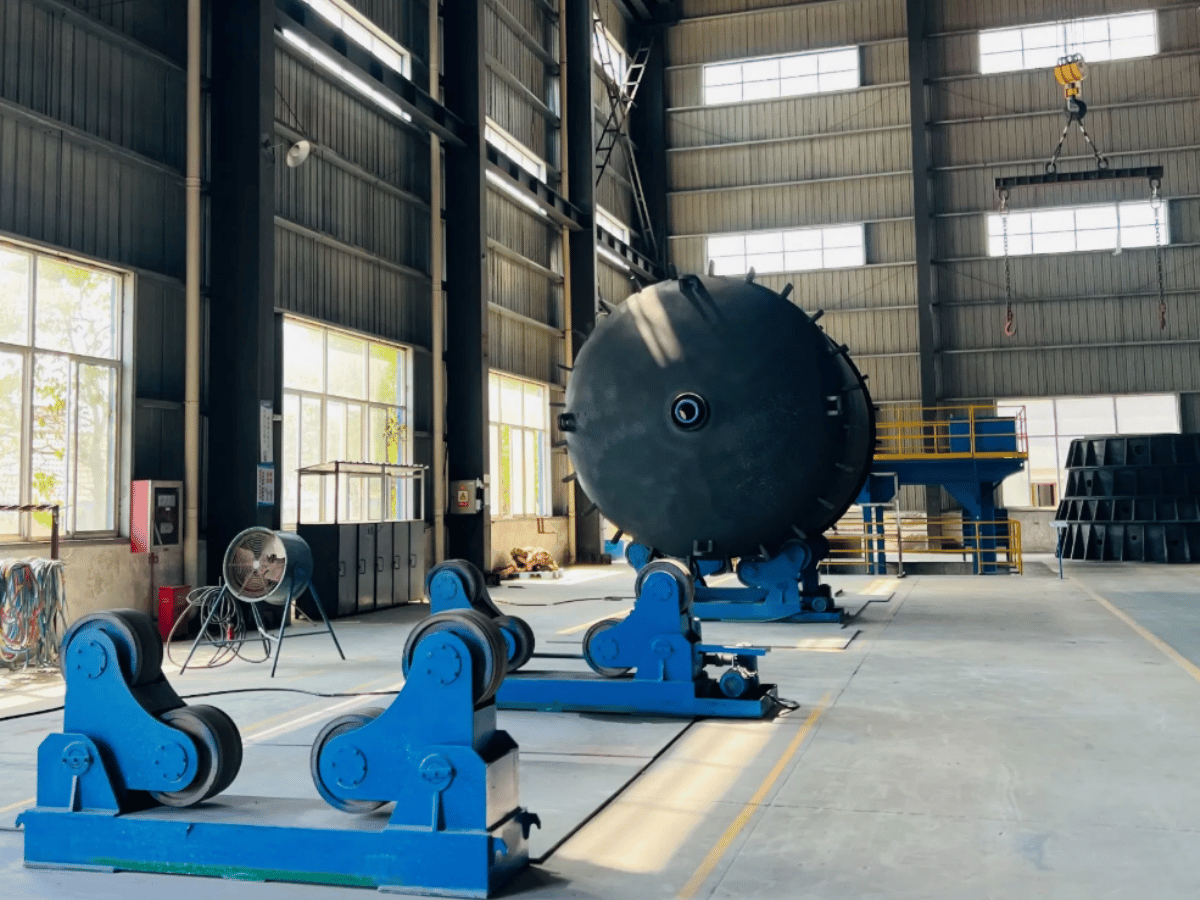
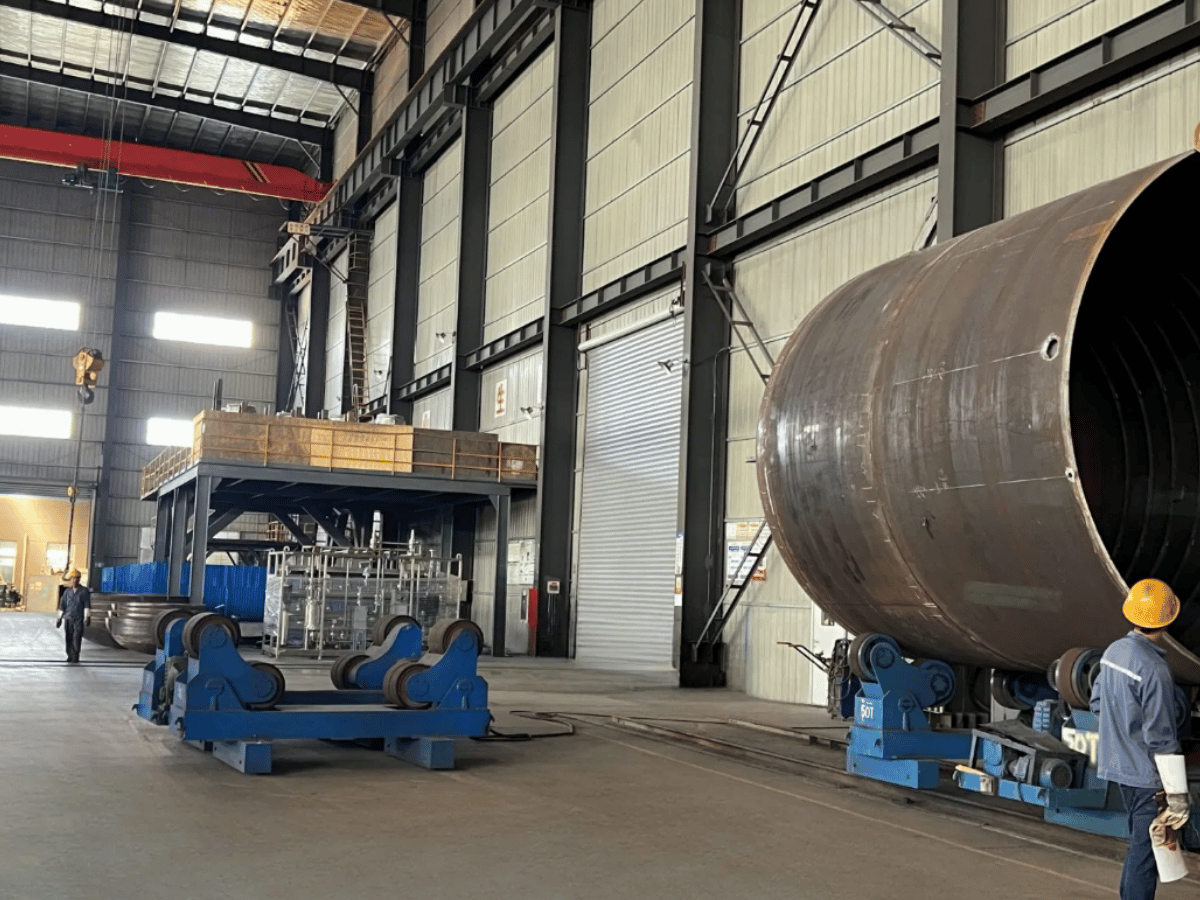
| Turning Rolls | None | Continuous | 500 – 100,000 lb | $1,200 – $40,000+ | Cylindrical vessels, pipes, tanks (long axis) |
| Floor Positioner | 0° – 135° | 0.1 – 3 RPM | 1,000 – 50,000 lb | $5,000 – $60,000+ | Heavy structural weldments, production shops |
Quick-selection systems: Long cylindrical workpieces (tank, vessel shell, pipe section) that rotate on their own axis turn rolls. Tilt and rotate units are necessary for joint access positioning. Under $800, a fixed-base turntable works if the joint always welds at one fixed position. 1,000+ lb parts may require a floor mounted positioner depending on part geometry.
See our pages on rotary welding positioners and 2-axis systems for more details about rotary configurations. One common fabrication shop mistake: investing in a fully motorized positioner for a 3-pieces-per-day operation when a $300–$400 manual tilter handles the same job.
How to Choose a Benchtop Welding Positioner: The 3×3 Selection Matrix
Most buying guides just recommend “thinking about your load and process.” That is not precise enough to make an educated equipment purchase. The 3×3 matrix below maps workpiece weight tier against welding process to give you a concrete starting spec for each combination. Use it as an initial short-listing formula in the RFQ phase.
| Workpiece Weight | TIG / GTAW | MIG / Flux-Core | Pipe / Heavy Structural |
|---|---|---|---|
| < 100 lb | 250 lb unit, 0.1–2 RPM, slip ring optional, DC motor preferred | 250 lb unit, 1–4 RPM, standard chuck, AC or DC motor | 250 lb unit, verify 90°+ tilt, hollow spindle if backpurge needed |
| 100 – 500 lb | 500 lb unit, 0.1–1 RPM, slip ring required for continuous welds, servo drive preferred | 500 lb unit, 1–3 RPM, high-torque worm gear, 500A+ ground | 500 lb unit, 135° tilt required, outboard roller support for long assemblies |
| > 500 lb | → Consider 2-axis floor positioner or headstock/tailstock system | 1,000 lb heavy benchtop, 800A+ ground, motorized tilt | 1,000 lb benchtop + turning rolls for long-axis support |
5-Point Purchase Checklist
- Determine actual ideal working load; weldment mass and fixture combined, factor by 1.5 for off-centered CG workpieces, equal to flat load.
- Find the tilt load value, and use your actual tilt situation, rather than the base flat value. You will find the two values differ, and the tilt value is the one to be concerned with.
- Ensure your ground circuit capacity can accommodate your process amperage: arc instability will result if your grounds are undersized.
- Consider a slip ring if executing continuous TIG or circumferential high-amperage welding; otherwise, counteracting freely flowing cable can initiate resistance spikes.
- Tailor a 50% capacity rise above your highest current work; as your production parts grow larger, paying to replace or upgrade a positioner in mid-contract is a costly burden.
🔧 Shop Scenario: Pressure Vessel Fab Shop
A small shop sells custom pressure vessel heads. They have one 180 lb. flanged assembly in production. The engineers specify a 500 lb. positioner, not a 250 lb. unit, because of the offset CG and the potential headroom for parts that will grow. Six months later, the shop acquires a new contract with 220 lb. assemblies welding in in-process time. The 250 lb. unit would have required an expensive upgrade in the middle of the run.
Explore RESIZE Benchtop Welding Positioners →
TIG, MIG & Pipe Welding: Matching Process to Positioner Specs
The cutting torch isn’t the only factor affecting equipment choices. TIG (or GMAW) on a rotary table requires different settings than a MIG welding station.
| Process | Speed Range | Ground Current | Slip Ring | Chuck / Fixture |
|---|---|---|---|---|
| TIG / GTAW | 0.1 – 1.5 RPM | 150 – 350 A | Required (continuous rotation) | 3-jaw or collet preferred |
| MIG / GMAW | 0.5 – 4 RPM | 200 – 500 A | Recommended ≥250A | T-slot table or tack fixture |
| Flux-Core (FCAW) | 0.5 – 3 RPM | 250 – 600 A | Required (high amperage) | Heavy-duty T-slot table |
| Pipe / Structural | 0.5 – 2 RPM | 200 – 800 A | Required | 3-jaw chuck or V-block fixture |
Does a Benchtop Welding Positioner Need a Slip Ring for TIG Welding?
For a continuous circumferential TIG weld – where the fixture is rotated continuously 360 or more – use of a slip ring is mandatory. Otherwise the welding cable and inert gas coupler will wrap around the workpiece, significantly increasing resistance. This not only decreases arc stability, but when it causes a short the machine will turn off. For short tack welds where the table is rotated by 90 or less per weld, a positioner without a slip ring can work, albeit with some risk and not for routine use.
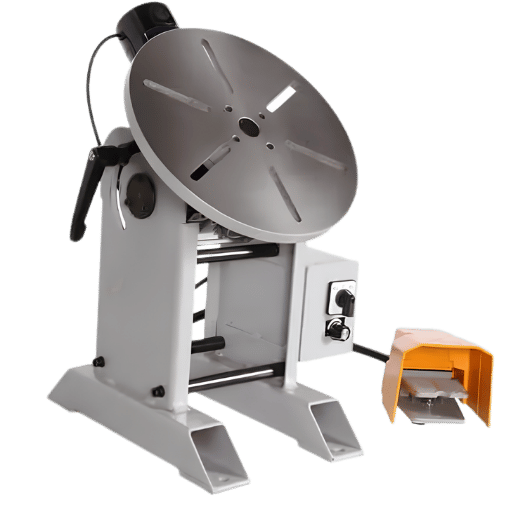
A third consideration for TIG aluminum welding is the variable-speed foot pedal. That foot pedal lets you start slow while the puddle establishes, then accelerate into the running bead without stopping. A mounting platform that allows a traditional TIG foot pedal on a variable-speed positioner is affordable and straightforward. If you plan to weld stainless with TIG, choose a fixture with a hollow table shaft with a port for inert gas back-purging.
Pro tip: When TIG welding, feed the output through the positioner’s internal slip ring or precious metal contact spring system – never a cable across the fixture. Lay the return ground lead from your weld through the cable, and you’ll see mysterious inconsistencies in your bead as resistance spikes – hard to troubleshoot but critical to eliminate.
Want to learn about pipe-specific fixtures? Check out our pipe welding positioners page and our wonderful breakdown of headstock/tailstock arrangements.
Setup, Mounting & Safety: Operating a Benchtop Welding Positioner Correctly
99% of positioner failures and 92% of welding accidents are the direct result of one or both of two simple errors: improper grounding or not training personnel on load tilting.
“Before you start welding, be sure to attach the ground lead of your welding machine to the stud provided on the positioner. Welding on a positioner that is simply bolted to a grounded steel workbench will cause high-amperage welding current to flow through the machine. If it flows through the bearings, it eventually will cause their failure. If it gets into the circuitry, a major burnout will result.”
📐 Engineering Note: Ground Cable Sizing
For positioners drawing as much as 500A back current, it is usually a good idea to run a minimum of 2/0 AWG (67 mm) ground cable from the positioner body to the workpiece connection point. Undersized ground cables cause arc instability, draw heat from the connection points and can burn up positioner circuitry. Per OSHA 1910.252 and ANSI Z49.1, the workpiece — or the metal table supporting it — must be grounded independently from the welding circuit connection.
⚠️ Tilted Load Warning
A 500 lb positioner holding a 500 lb assembly at 45° tilt, with the workpiece CG offset 8 inches from center, experiences an effective moment-arm load exceeding 850 lb at the table bearing — well above the rated flat-position capacity. Always calculate the tilted load before starting a new part program on a tilted table.
7-Item Safety Commissioning Checklist
- Check ground circuit continuity from positioner body to work clamp prior to first arc
- Check table balance – add counterweights opposite the eccentric clamps before tilting
- Check foot pedal interlock operation (rotation halts when foot pedal is released, if installed)
- Quarterly, inspect slip ring contact brushes; replace when evidence of pitting or carbon buildup is found
- Never surpass the duty cycle rating without a cooling break – most benchtop positioners are rated at 60% duty cycle
- Clamp workpeices with at least 3 points of hold-down to prevent rotation off of table
- Lock table tilt clamp when not in use – unsecured tilting head can swing under vibration
🔧 Shop Scenario: Eccentric Tilt Incident
A fabrication shop mounted an assembly within the positioner’s flat-table rating. Nobody took into account the tilted load with the Workpeice CG offset 9 inches from center. When the operator tilted his table to 90 and began rotation the table bearing took an effective load over twice the rated tillded value. The consequence: bastardized bearing races and a three week delay on installation. The mitigation: cost $0 if specified during the specification phase – calculate the tilted moment prior to first cycle for every new part program.
See also: RESIZE welding positioner safety guidelines – a complete operational protocol for commissioning and daily use.
Benchtop Welding Positioner Cost, Brands & What to Know Before Buying

The price range is enormous – more than one order of magnitude between entry level turntables and industrial servo powered positioners. What accounts for this is more important than the numbers themselves.
| Tier | Price Range | Typical Specs | What You Get / What You Don’t |
|---|---|---|---|
| Entry / DIY | $300 – $900 | <150 lb, no motor, basic tilt | Manual tilt, no speed control, no slip ring, no load certification |
| Professional | $1,700 – $3,500 | 200–500 lb, motorized, variable speed, foot pedal | Worm gear drive, DC motor, optional chuck, foot switch, basic slip ring |
| Industrial / Precision | $4,500 – $9,000+ | 500–1,000 lb, servo drive, full slip ring, digital speed display | Servo accuracy, CNC-ready interface, warranty support, USA or European build quality |
Hidden Costs to Budget For
- Freight: Most positioners will arrive to you via LTL truck delivery – assume $150-$500.
- Import Duty: HCST code on Chinese manufactured welding positioners is 8515.80.0000 at 6.5% – confirm at USITC.
- Chuck or fixture: Many list prices will not include a chuck – assume $200-$600 for a decent 3 jaw welding chuck.
- Commissioning:Remember to include electrical commissioning time and first piece balancing on new positioners.
On DIY positioners: The majority of Google searches for “DIY welding positioner” are from workers fabbing-up their own robotic cells. DIY positioners will work for hobbyist single piece, low-production jobs. Due to worm gear backlash, unknown load-rating and lack of ground certification however, DIY unit investments are poor in the long run. Most fabricators who build a DIY are forced to buy a commercial unit within 18 months.
For budgeting an entry level benchtop positioner, see our dedicated buyer’s guide. Or go directly to the RESIZE welding positioner product line to compare models and request a quote.
Industry Outlook: Servo Drives, Cobot Integration & the Future of Benchtop Positioners
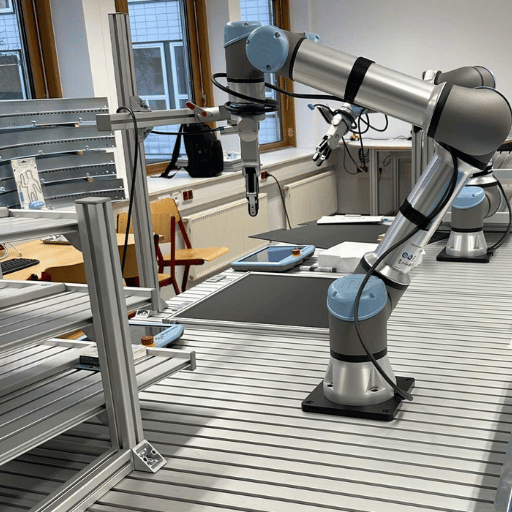
The global robotic welding market was valued at $8.1 B in 2025 and is projected to achieve a value of $27.9 B by 2034 registering a CAGR of 15.2%. That growth is not happening in spite of benchtop positioners – it’s happening around them. As collaborative robots (cobots) take on more circumferential and repetitive welding tasks, the positioner becomes the 7 th axis of the system.
The American Welding Society projects a shortfall of 320,500 qualified welders by 2029. Shops are not replacing welders with robots – they’re extending individual welders throughput per shift with cobots. A servo-driven benchtop positioner with a digital speed interface (RS-485 or EtherNet/IP) can synchronize the rotation speed of the positioner with the python torch motion of the cobot in real-time, converting a one-welder operation into a semi-automated work cell.
Are Benchtop Welding Positioners Compatible with Collaborative Robots?
Modern servo-driven benchtop positioners with RS-485 or EtherNet/IP communication ports can be operated as a synchronized 7 th axis in conjunction with most major cobot brands. The positioner will accept speed and position commands from the robot controller rather than the foot pedal, allowing the torch path and table rotation to stay in exact synchronization throughout a weld program. AC motor positioners with analog-only speed control cannot achieve this integration without a complete drive replacement – and the mechanical drive (worm gear, geartrain) cannot be retrofitted to servo precision after purchase.
Spec priority for future-proofing (2025-2026): select a positioner with a servo drive and digital speed output from day one. Cost delta between servo and AC motor units at the 500 lb tier runs $800-$1,500 – far less than a complete replacement when cobot integration later becomes a business need.
Related: Servo vs. AC motors for welding positioners | Robotic welding positioner integration guide
Frequently Asked Questions — Benchtop Welding Positioner
What load capacity do I need in a benchtop welding positioner?
Take your heaviest intended workpiece, add the fixture weight, and then multiply by 1.5 to account for eccentric CG loads and expected shop growth. That produced load is your minimum rated flat capacity. Equally important: get the manufacturer to state the tilted capacity at your actual working angle. This number can be 30-70% below the flat rating, and it’s the figure that in fact governs safe operation. A 500 lb positioner holding a 400 lb assembly at 90 with an 8-inch CG offset may already be over its tilted rating – and that calculation is rarely shown in product listings.
Can I use a benchtop welding positioner for TIG welding?
Definitely. Look for a DC motor, a variable-speed foot pedal, and a slip ring rated to your process amperage. Routing return current through the table bearings instead of a dedicated ground circuit will destroy them.
What is the difference between a benchtop welding positioner and a welding turntable?
A welding turntable has a fixed base on one horizontal plane. It cannot hold the joint at different angles— the weld is always in whatever orientation the base plate is in. A real welding positioner will feature a motorized or manual tilting head (most run 0-90 or 0-135), so you can hold a pipe-to-flange joint flat, then tilt it vertically for the next pass without having to reposition the workpiece.
Turntables are the low-cost choice for dedicated single-angle work. For shops running multiple part families with different welding angles, positioners are more flexible. See our positioners versus turntables article for a complete side-by-side comparison.
How much does a benchtop welding positioner cost?
Chucks in cataog from approx $300-$600. Production units Motor Driven begin at $1,700 and go through $3,500 to at 250-500 lb capacity. Servo driven industrial units at are from 500-1,000 lb run $4,500-$9,000+.
Situ price usually out do include chuck or freight.
Does a benchtop welding positioner need a slip ring?
For continuous circumferential welds – ie. any run in excess of 270 where the table is rotating, then a slip ring or spring-loaded brush contact must be employed. Without one, the welding cable and gas hose will wrap around the job and cause increased resistance as the table rotation progresses. This interrupted the welding arc stability, and causes an eventual run shutdown to occur.
Short-arc tack runs of less than ¼ turn are still fine without a slip ring, although the cable routing takes considerably longer to set up. Above 250A process amperage, a properly rated brush contact is essential for arc quality and equipment protection — undersized brushes cause positioner body heating on higher-amperage setups.
What safety certifications should a welding positioner have?
Check for OSHA 1910.252 compliance and a tested, rated ground circuit. CE marking indicates compliance with the various European directives. Inquire specifically for ground circuit test documentation – most lower priced units have a ground lug but no tested current rating.
Can a benchtop positioner handle pipe welding?
Pipe-to-flange and pipe end-to-end joints within the positioner’s load rating are comfortably within its design envelope, but tilt 45 for a pipe-to-flange fillet in the flat position; tilt 90 for a pipe butt weld in flat position. Large-diameter sections rotating along their own long axis belong on turning rolls, not a benchtop positioner. Put them together and use the positioner and roller steady rest together; the positioner grabs one end, the steady rest the other.
Guidance on size can be found in choosing a positioner for pipe welding.
About This Guide
RESIZE engineers have developed and produced a series of welding positioners for fabricators throughout North and South America, Europe, and Southeast Asia. The specifications, safety instructions, and recommendations for choosing this benchtop positioner given here accurately characterizes the specifications we engineer to—not marketing slogans. Third-party sources, where used, are referenced in the References section following.
Specialists in welding positioner design, CNC integration, and fabrication automation systems. The RESIZE technical team reviews all specification data and safety guidelines prior to publication.
Related Articles
- Small Shop Welding Positioner Solutions — Finding the Right Fit for Limited Budgets
- Welding Positioner Chuck Guide — 3-Jaw, Collet, and Custom Options
- Positioner Speed Control Systems — From Basic Dial to Servo Precision
- Welding Positioner Safety Guidelines — Commissioning Checklist and Operating Protocol
- The Beginner’s Guide to Welding Positioners — How They Work and What They Cost
- Zero-Backlash Positioner Technology — Worm Gear vs. Servo Drive Performance
References & Sources
- OSHA 1910.252 — General Requirements: Welding, Cutting, and Brazing. Occupational Safety and Health Administration. [Tier 1]
- Honhart, K. “Putting the Spin on Benchtop Positioners for Tube and Pipe Welding.” The Fabricator (FMA Publications). [Tier 2]
- “Grounding and Arc Welding Safety” Lincoln Electric Resource Center. References: ANSI Z49.1:2005 Safe in Welding, Cutting, and Allied Processes; NFPA 70 National Electrical Code. [Tier 3 / ANSI Z49.1= Tier 1]
- American Welding Society (AWS). Welding Workforce Status Report American Welder Deficit Projection through 2029. [Tier 2]
- “Robotic Welding Market Size, Share & Growth Report” Fortune Business Insights (2025). Robotic Welding Projected CAGR: 15.20% through 2034. [Tier 3 – market research; cited for directional context only]

